


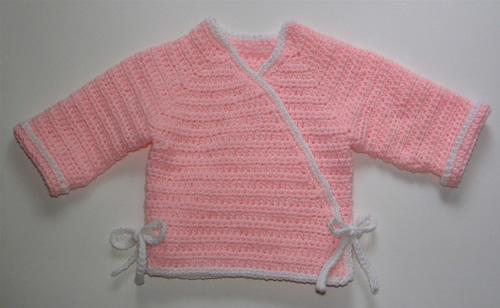
Abrianna
If you can’t open this PDF file you need Adobe Acrobat Reader. Get it here.)
Shown in size Small
SIZES
Directions are for women’s size X-Small. Changes for sizes Small, Medium, Large, 1X and 2X are in parentheses.
FINISHED MEASUREMENTS
Bust (closed) – 32(36-40-44-48-52)”
Length – 18(18-19-20-21-21½)”
MATERIALS
7(7-9-10-11-12) Hanks BERROCO LATITUDE (50 grs), #5658 Red rock Canyon
Straight knitting needles, sizes 3 (3.00 mm) and 5 (3.75 mm) OR SIZE TO OBTAIN GAUGE
29” Length circular knitting needle, size 3 (3.00 mm)
Four 1” buttons
GAUGE
25 sts = 4”; 24 rows = 4” in Pat St on larger needles
TO SAVE TIME, TAKE TIME TO CHECK GAUGE
NOTE
When decreasing over Pat St, if there are not enough sts to work an entire repeat, work the extra sts in St st.
STITCH GLOSSARY
Dec 5
K2 tog through back loops (TBL); k3 tog; pass the k2 tog TBL st over the k3 tog st
PATTERN STITCH (Multiple of 6 sts + 1)
Row 1 (RS): P3, * k1, p5, rep from * to last 4 sts, end k1, p3.
Row 2: K3 tog, * yo, (k1, yo, k1) all in next st, yo, Dec 5, rep from * to last 4 sts, end yo, (k1, yo, k1) all in next st, yo, k3 tog TBL.
Row 3: K1, * p5, k1, rep from * across.
Row 4: P1, * k5, p1, rep from * across.
Row 5: Rep Row 3.
Row 6: K in front and back of first st (inc 1), * yo, Dec 5, yo, (k1, yo, k1) all in next st, rep from * to last 6 sts, end yo, Dec 5, yo, k in front and back of last st.
Row 7: Rep Row 1.
Row 8: K3, * p1, k5, rep from * to last 4 sts, end p1, k3.
Rep these 8 rows for Pat St.
BACK
With smaller straight needles, cast on 102(114-126-138-150-162) sts.
Ribbing: Row 1 (RS): K2, * p2, k2, rep from * across.
Row 2: P2, * k2, p2, rep from * across. Rep these 2 rows until piece measures 5” from beg, end on WS, inc 1 st at end of last row – 103(115-127-139-151-163) sts. Change to larger needles and work even in Pat St until piece measures
10½(10½-11-11½-12-12½)” from beg, end on WS.
Shape Armholes: Bind off 4(6-7-8-9-10) sts at beg of the next 2 rows, 3(4-5-6-7-8) sts at beg of the next 2 rows, 2(3-5-6-6-7) sts at beg of the next 2 rows, 2 sts at beg of the next 4 rows, then dec 1 st each side of next 1(1-1-1-2-2) rows – 75(79-83-89-95-101) sts. Work even in pat as established until armholes measure 7½(7½-8-8½-9-9)”, end on WS. Bind off. Measure in 3(3-3½-4-4½-5)” from each armhole edge and mark for back neck.
LEFT FRONT
With smaller straight needles, cast on 50(54-62-66-74-78) sts. Work in ribbing same as back for 5”, end on WS, dec 1(inc 1 - dec 1- inc 1 - dec 1 -inc 1) at end of last row – 49(55-61-67-73-79) sts. Change to larger needles and work even in Pat St until piece measures 10½(10½-11-11½-12-12½)” from beg, end on WS.
Shape Armhole and Neck: Next Row (RS): Bind off 4(6-7-8-9-10) sts, work to last 3 sts, k2 tog, k1 (neck dec). Continue to shape armhole same as back and AT THE SAME TIME, dec 1 st at neck edge every RS row 17 times more. When all decs have been completed, work even in pat as established on 17(19-21-24-27-30) sts until armhole measures 7½(7½-8-8½-9-9)”, end on WS. Bind off.
RIGHT FRONT
Work to correspond to left front, reversing all shaping. Work neck decs at beg of RS rows as k1, SSK. Bind off for armhole on WS rows.
SLEEVES
With smaller straight needles, cast on 78(78-86-96-98-102) sts. Work in ribbing same as back for 4”, end on WS, inc 1(inc 1 - dec 1 - inc 1 - dec 1 - inc 1) at end of last row – 79(79-85-91-97-103) sts. Change to larger needles and work even in Pat St until sleeve measures 5” from beg, end on WS.
Shape Cap: Bind off 4(6-7-8-9-10) sts at beg of the next 2 rows, then 2 sts at beg of the next 24(20-18-16-14-18) rows – 23(27-35-43-51-47) sts. Dec 1 st each side every RS row 3(5-6-7-8-6) times, end on WS. Bind off remaining 17(17-23-29-35-35) sts.
FINISHING
Sew shoulder seams. Sew in sleeves. Sew side and sleeve seams.
Left Neck/Frontband: With RS facing, using circular needle, beg at center back neck, pick up and k20 sts along back neck edge, 46(46-50-54-58-58) sts along left front neck edge, then 64(64-68-72-76-76) sts along left front edge – 130(130-138-146-154-154) sts. Beg with Row 2, work in ribbing same as back for 1½”, end on WS. Bind off in ribbing.
Right Neck/Frontband: With RS facing, using circular needle, beg at lower right front edge, pick up and k64(64-68-72-76-76) sts along right front edge, 46(46-50-54-58-58) sts along right front neck edge, then 20 sts across remaining back neck edge. Beg with Row 2, work in ribbing same as back for ¾”, end on WS.
Buttonhole Row (RS): * Work 9(9-10-11-12-12) sts, yo, k2 tog, rep from * 3 times more, work to end. Complete to correspond to right neck/frontband. Sew edges of bands tog at center back neck. Sew on buttons.

source:berroco.com

autumn leaves


Autumn Leaves
I’d have to say that the colors of the yarn inspired this sweater; the soft, fall colors reminded me of walking through the woods with the leaves swirling down. I wanted it to be a jacket that could be worn during the changing of the seasons so I knit it at a tighter gauge than usual. I am a big advocate of personalizing things that I make, and I wanted to give others a chance to make this design their own. I left the sweater plain for the most part, so that the detail could be added later, with embroidery, as the knitter desires.
SIZE
Newborn[3, 6-12, 18, 24, 36) months
Shown in 24 months
FINISHED MEASUREMENTS
Chest: 17.25[20.5, 21.75, 22.75, 24, 26] inches
Length: 7[8.5, 9.75, 10.5, 11.5, 12.5] inches
MATERIALS
Berroco Ultra Alpaca [50% Peruvian Wool, 50% Super Fine Alpaca; 215 yds/198 meters per 3.5 ounce/100 gram hank];
#6279 Potting Soil Mix [MC]; 2 skeins
#6281 Redwood Mix [CC1]; 25 yards
#6280 Mahogany Mix [CC2]; 25 yards
#6253 Dijon [CC3]; 25 yards
#6275 Pea Soup Mix [CC4]; 25 yards
Recommended needle sizes
US #4/3.5mm 24 inch circular needle and dpns (set of 4)
US #5/3.75mm 24 inch circular needle and dpns (set of 4)
NOTIONS
Stitch markers
4-6 .5inch buttons
GAUGE
23 sts and 30 rows = 4 inches in St st on larger size needles before washing and blocking
21 sts and 31 rows = 4 inches in St st on larger size needles after washing and blocking
Note: Ultra Alpaca relaxes after washing and blocking. Pattern calculations are based on the post-washing gauge.
PATTERN NOTES
This cardigan is worked from the bottom up, with no seams. Body is worked to the underarms, then placed on hold while the sleeves are worked and then attached to the Body, then yoke is worked as one piece to the neck. Neck and Button Bands are picked up and kni
t later.
STRIPE SEQUENCE
CC1: Knit 2 rows
CC2: Knit 2 rows
CC3: Knit 2 rows
CC4: Knit 2 rows
INSTRUCTIONS
LOWER BAND
With smaller circular needle and CC1, cast on 89[106, 112, 118, 124, 135] sts.
Rows 1-8: Work 8 rows in Garter st (knit every row) following stripe sequence.
BODY
Change to larger circular needle and MC and work in St st until piece measures approximately 4.25[5.25, 6, 6.75, 7.25, 7.75] inches from cast on edge, ending with a WS row. Set aside.
SLEEVE

SLEEVE BAND
With smaller dpns and MC, cast on 30[38, 40, 42, 44, 46] sts. Being careful not to twist sts, join to work in rnd. Place marker.
Rnds 1-8: Following stripe sequence, work 8 rnds in Garter st (knit 1 rnd, purl 1 rnd).
SLEEVE BODY
Change to larger dpns and MC and work in St st until Sleeve measures approximately 4.25[5, 6, 7, 8, 9] inches from cast on edge, ending with a WS row.
Place last 8[8, 8, 8, 10, 10] sts on a piece of waste yarn (underarm) to hold for grafting;
slip remaining 22[30, 32, 34, 34, 36] sts onto second strand of waste yarn and set aside.
Repeat for second Sleeve; do not slip last 22[30, 32, 34, 34, 36] sts onto waste yarn.
YOKE
Row 1 (Joining): Beginning at right front, k18[22, 23, 25, 25, 28] sts, slip next 8[8, 8, 8, 10, 10] sts onto waste yarn, pm; with RS of Sleeve facing, k22[30, 32, 34, 34, 36] from second sleeve, pm, k37[46, 50, 52, 54, 59], slip
next 8[8, 8, 8, 10, 10] sts worked onto waste yarn, pm, with RS of first Sleeve facing, slip 22[30, 32, 34, 34, 36] sts from first sleeve waste yarn onto left needle and knit across, k18[22, 23, 25, 25, 28]: 117[150, 160, 170, 172, 187] sts.
Rows 2-8: Work even in St st.
NOTE: Raglan decreases and Neck Shaping are worked AT THE SAME TIME. Please read all instructions before starting this section.
Raglan Decrease Row: * Knit to within 2 sts of first marker, ssk, slip marker, k2tog; repeat from * 3 more times, knit across: 109[142, 152, 162, 164, 179] sts.
Continue decreasing in same manner every RS row 4[4, 5, 5, 5, 6] more times: 77[110, 112, 122, 124, 131] sts.
Neck Shaping
Continue to work raglan decreases every RS row and AT THE SAM
E TIME, work Neck Shaping as follows.
Next 2 Rows: Bind off 6 sts at neck edge of next 2 rows.
Next Row: Dec 1 st at each neck edge, every row 4[5, 6, 7, 8, 8] times: 33[56, 56, 56, 56, 63] sts.
Neck Band
Change to smaller size circular needle.
With CC4 and beginning at right front edge, pick up sts
evenly along neck edge, knit across sts on needle, pick up sts evenly along left neck edge.
Row 1: Knit across.
Rows 2 and 3: With CC3, knit across.
Rows 4 and 5: With CC2, knit across.
Rows 6 and 7: With CC1, knit across.
Bind off all sts loosely knitwise.

Button Band
For Girls, work buttonholes on right front; for boys, work buttonholes on left front.
Tip: Work buttonholes on both sides. You will be able to change buttons for a boy or girl.
Mark front edge for buttonholes, having the first marker a half inch from bottom and the last marker a half inch from top and desired number of remaining buttonholes evenly spaced in between. With RS facing and CC4, pick up 4 sts for every 5 rows along front edge.
Row 1: Knit across.
Row 2: With CC3, * knit to buttonhole marker, k2tog, yo; repeat from * across, knit across.
Rows 3-7: Work same as Neck Band.
Bind off all sts loosely knitwise.
Repeat for second side, working buttonholes if desired.
FINISHING
Using Kitchener st, graft underarm sts together.
Sew buttons to front band opposite buttonholes.
Weave in all ends
Leaves
Using tapestry needle and contrasting colors and referring to charts, embroider leaves as follows:

Bring needle up at A and down at B (about .125-.25 inch away). Bring needle up at C and, leaving a small loop, insert down at D. Bring up at E and back down at B to anchor the stem stitch. Repeat as many times as desired by slightly widening each loop and then bringing stitches closer together to form a leaf shape. Simple designs for embroidering the leaves have been included. Make the leaves as large or as small as you wish, or be creative and make up some of your own!


Half-Hour Booties


Designs by: Abigail Goss of Crot
Materials:Worsted weight yarn (MC/CC)
"N" crochet hook
"H" crochet hook
Gauge: 3 vertical bars = 1", Sole measur es 3"-3 1/2"
With MC and "N", Make sl st 5" from end of yarn(used for sewing the back seam). Ch 11
Body of bootie :
Work 7 rows of afghan stitch.
Toe:
Ch 1, *insert hook into next two vertical bars, YO, pull through 3 loops on hook. Rep * across. Ch 1, turn.
Pull up a loop in each st across. YO and pull through all loops on hook. PULL TIGHT to close toe. Ch 1, Fasten off and leave a long 10" tail.
Sew up back seam with beg yarn.
Sew up top of foot, leaving about a 1 1/4" for ankle(about 5 rows).
Ankle Ribbing:
Row 1: With CC and "H" hook, Dc around ankle, putting 14-16 dc around. Join, ch 3. Do not turn!
Row 2: *FPDC around next dc, BPDC around next dc. Rep * around, join, fasten off
Embellishment (optional):
With CC and "H" hook, ch 5, sl st in first ch to form a ring.
*Ch 8, sl st into ring. Rep * 4 times, fasten off, leave tail-sew to top of bootie.
source:crotiques.com
SOCKIES
(baby version)


Materials:
Sport weight yarn (Jamie was used here)
"J" crochet hook
Size(s): Preemie(Newborn,12 months)-Changes for each size in parenthesis.
NOTE: beg ch does NOT count as a st!
Row 1. Ch 2, crochet 6(7,8) sc in second ch from hook. Join with sl st to first sc. Do not turn. 6(7,8) sc.
Row 2. Ch 1, 2 sc in each sc. Join with sl st to first s
c. 12(14,16).
Row 3-5(6,7). Ch 2,hdc in first st(beg ch does NOT count as a st)and in each st around. Join to first st. 12(14,16)
Row 6(7,8). Ch 2, hdc in first 10(12,14) sts. Ch 2, TURN.
Next 2 rows. Hdc across, ch 2, turn.
AT END OF LAST ROW, DO NOT FASTEN OFF!
CUFF
Ch 1. Join with sl st to beg st of THIS row. Ch 1, turn,
Row 1. (working from outside) Place 13(15,17) sts around leg opening(ends of hdc rows). Join with sl st to first sc. Ch 2
Row 2 & 3. Hdc around. Join. 13(15,17)
(ribbing)
Row 4 & 6: CH 2(counts as first BPDC on these rnds only!). (FPDC, BPDC) alternatively around. Join to top of ch 2. Fasten off.
HEEL
Cut a 6" piece of yarn. Weave through st
s at heel of foot, draw up tightly and tie in a double knot. Weave ends in.


Cuffs folded down(Above)-Cuffs up(below)
The one on the left, below, is the version that matches
the lacy, picot layette. The cuff can be matched
to the stitch pattern of your layette.


source:abigailgoss.com
These are so quick and easy...and no ribbons
to tie, it makes it's own ties!

Worsted Weight Yarn, 1 1/4 OZ, pink (blue, for boys)
"I" hook
Gauge= Sole is 3 3/4" long
Ch 8
SOLE
Rnd 1: 2 dc in 3rd ch from hook, dc in next 4 sts. (3 dc, 3 hdc) in last ch. Working on other side of ch, hdc in next 4 chs. (3 hdc) in last ch. Join with sl st.
Rnd 2. Ch 3, dc in same st. (hdc, sc) in next st. Sc in next 6 sts, (sc, hdc) in next st, (hdc, dc) in next st, (2 dc) in next st, (hdc, sc) in next st, sc in next 6 sts, (sc, hdc) in next st. (hdc, dc) in last st. Join to first st with sl st. (28 sts)
SIDES/TOP
Rnd 3. Ch 2, hdc in next st and in each around. Join w/ sl st to ch2. (28 sts)
Rnd 4. CH 2, hdc in next 11 sts, dc2tog, dc3tog , dc2tog, hdc in next 9 sts, join. (24 sts)
Rnd 5. Ch 1,sc in same st, sc in next 10 sts. Hdc2tog, Dc2tog, hdc2tog, sc in next 5 sts, sc 2 tog, join to first sc w/ sl st.
Rnd 6: Ch 1, sc in same st, sc in next 8 sts, (ch 20, sl st in 2nd ch from hook, and in each st across the ch, 20. Sl st in last sc.) FOR STRAP. Sl st in next 8 sts. Rep FOR STRAP. sc in last 3 sts. Join. Fasten off. Weave in all ends. Attatch a pompom or FLOWER BELOW to top off each booties.
FLOWER Ch 3, 2 dc in 1st ch, ch 2, sl st in 1st ch(becomes ring). *Ch 2, 2dc in ring,ch 2, sl st into ring. Rep for 4 times. (5 petals). Fasten off leaving tail to sew and attatch to top of shoe.
source:crotiques.com
(Corrected version)
THESE ARE SUPER QUICK!


Small amount pink, worsted weight yarn
"I" Crochet hook
Size=0-6 months
Gauge: Sole measures 3 1/2"
SOLE
Ch 8
1. 2 Hdc in 3rd ch from hook, DC in next 4 chs, 6dc in last ch. Working on other side of chain, in free loops, HDC in next 4 chs. (3 HDC) in last ch. Join w/ sl st to beg ch. (20 sts)
2. CH 1, 2 sc in same st. sc in next 8 sts, (2sc in next st)3 times. Sc in next 6 sts. (2 sc in next st)2 times. Join with sl st to fi rst sc. (26 sts)
SIDES
3.(Working in back loops this rnd)Ch 2, Hdc in each st around. Join (26 sts)
4. Ch 2, hdc in next 10 sts, (Dc next 2 sts tog)3 times. Hdc in next 7 sts. Hdc next 2 sts tog. Join to first hdc.
5.CH 1, sc in same st. sc in next 9 sts. DC 5 sts TOG as one--->[(YO, insert hook in next st, yo, pull up a loop, pull through 2 loops on hook)5 times. YO and pull through all loops on hook]. sc in next 7 sts. Join to first sc.
FOR STRAP
6. Ch 1, sc in same st. sc in next 6 sts. Ch *4*, sk next 7 sts. sc in last 4 sts. Join to first sc (15)
7. Ch 1, sc in same st. sc in all stitches around. Join (15)
***For bigger strap, or bigger le g, chain 5 on round 6***
source:abigailgoss.com

Materials:
Size "10" thread
Size "6" and "7" steel hook
LACE
Ch 42. Join with slip stitch to form ring.
Row 1: Ch 1, sc in same st and in each ch aro und. (42)
Row 2: Ch 4, Dc in same st. *Sk next 2 sc, (dc, ch1, dc) in next st. Rep from * around. Join with sl st to 3rd chain.
Row 3: DO NOT CHAIN. *4 DC in ch 1 sp, sl st in space between "V". Rep around ending with sl st in last space before beg of row.
OPTIONAL*
This part makes it look more lacy.
Row 4: [(Ch 3, sls st in next dc)4 Times, sl st in space between "hump"]Rep between [brakets] around. Finish off.
ATTCHING
With lace humps pointing down, join thread with sc to any st. Working around shoe strap AND lace..sc in each spa ce on lace around...it will average 2 sc in each sc on shoe...This is because the thread is smaller than the yarn, you can't match every stitch...
With "7" steel hook, sc in each st around. JOIN. Fasten off...
ROSE
Rnd 1: With "6" hook, ch 3, 9 dc in 3rd ch from hook. DO NOT JOIN.
Rnd 2. sc in beg dc. *ch 3, sk next st, sc in next. REP * around. Join with first sc. (5 loops)
Rnd 3: (sl st, ch 2, 4dc, ch 2) in each loop (5 petals)
Rnd 4: Ch 1, working behind petals, sc in missed ch's back loop(BL) on Rnd 1, *ch 4, sc in next missed ch's BL. REP * around. Join to first sc. (5 loops)
Rnd 5: (sl st, ch 2, 6dc, ch 2) in each loop aro und. Join to first sl st.
Fasten off, leave 6 in. tail for sewing to front of bootie

source:abigailgoss.com

Materials:
Size "10" thread
Size "6" and "7" steel hook
LACE
Ch 42. Join with slip stitch to form ring.
Row 1: Ch 1, sc in same st and in each ch around. (42)
Row 2: Ch 4, Dc in same st. *Sk next 2 sc, (dc, ch1, dc) in next st. Rep from * around. Join with sl st to 3rd chain.
Row 3: DO NOT CHAIN. *4 DC in ch 1 sp, s l st in space between "V". Rep around ending with sl st in last space before beg of row.
OPTIONAL*
This part makes it look more lacy.
Row 4: [(Ch 3, sls st in next dc)4 Times, sl st in space between "hump"]Rep between [brakets] around. Finish off.
ATTATCHING
With lace humps pointing down, join thread with sc to any st. Working around shoe strap AND lace..sc in each space on lace around...it will average 2 sc in each sc on shoe...This is because the thread is smaller than the yarn, you can't match every stitch...
With "7" steel hook, sc in each st around. JOIN. Fasten off...
BOW
Ch 17, DC in 3rd ch from hook and in each st across (14dc)
Row 2-6: CH 2, hdc across
Row 7: Sl st in next 7 sts, ch 10, dc in 3rd ch from hook and each st of this new ch. Sl st in next st (of original "bow") to anchor it. Finish off, leaving tail for sewing to booties.
Note. Wrap the "ch 10" around the bow tightly, then sew on through that...

source:abigailgoss.com
Baby Girl Sl
eeper Set


Size: 0-3 months
Materials
Pink sport weight yarn
White sport weight yarn
"I" hook
Special Stitches: Shell=(2DC, ch 1, 2DC).
With pink, Ch 40
1. Dc in 3rd ch from hook and in next 3 chs, 3dc (corner made), Dc in next 7 chs, 3dc (corner made),dc in next 11,
3dc (corner made), Dc in next 7, 3dc (corner made), Dc in last 5. Ch 3 turn. (47 dc)
2. Dc in next 5dc, CORNER, dc in next 9, CORNER, dc in next 13, CORNER, dc in next 9, CORNER. dc in last 6 sts. Ch 3, turn (55 sts)
3. Dc in next 6 dc, CORNER, dc in next 1
1, CORNER, dc in next 15, CORNER, dc in next 11, CORNER, dc in last 7 sts. Ch 3 turn. (63 sts)
4. Dc in next 7, CORNER, dc in next 13, CORNER, dc in next 17, CORNER, dc in next 13, CORNER, dc in last 8 sts. Ch 3, turn. (71 sts)
5. 2dc in base of ch 3, *Sk 1 st, Shell in next. Rep * across to last 2 sts. Sk next st, 2dc in last, Join with sl st to beg ch. Fasten off pink.
6 (making armholes). With white, In s
ame "shell", ch 3, dc in sp, ch 1, 2dc in space (1st shell made). (working shells in ch 1 sp of shells below)Shell in next 5 shls . Sk 8 shls. Shell in next 10 shls. Sk next 8 shls. Shell in last 4 shls. Join to first ch 3. DO NOT TURN. (20 shells)
7-14 (or desired legnth): Ch 1, sl st into ch1 space of next shell, (Ch3, dc, ch1, 2dc)all in same shell (beg shell made). Shell across. Join to ch 3. At end of last row, fasten off white.
15. With pink, attatch yarn to any sp between any 2 shells with sl st. *5 dc in ch 1 sp of next shell. Sl st in between shells. Rep * around. Sl st in first sl st. Fasten off
Decoration: Add flower below or any small decoration
Ch 4, Join to form ring. *Ch 3, 2 dc, sl st into ring. Rep 5 times. Fasten of leaving 10 in tail and sew to front, ce
nter of sleeper.
Edging (slip stitching in ends of rows)
Attatch pink yarn to any st around neck. Sc around rem neck stitchs. At the corner that opens to the back, Ch 18, sl st back down ch (first tie made). Sl st half way down back. Ch 18, Sl st down ch. Sl st down rest of the way. When you get to the opening where you made the first white shell, Do not sl st in the white shell. Only continiue on the other side sl stitching in only pink sts. This closes th
e back up a little. Sl st up to place opposite of second tie, Place tie, Sl st up to place of first tie, Place tie, sc around rest of neck. Join with sl st to first sc. Fasten off.
Note about butterfly knot: I usually tie the ties in this manner: Take both ties TOGETHER. Grasp them together at the base. Make a loop with them together at the base, and pull ends through. Push knot to base of ties (see picture below). It is sort of a knot that resembles antennas. Works well for me.

Diaper Cover
With white, Chain 30
Row 1.Dc in third chain from hook and in each chain to the end. Ch 2, turn
Row 2 Hdc across. Do not ch for beg ch.
Row 3: sk last st made on row before, DO NOT CH, hdc in next stitch and in each stitch across, do not hdc in last stitch. turn.
Row 4-9: repeat row 3. You will be decreasing 2 stitches on each row
Row 10-12: ch 2, hdc in each hdc across, ch 2, turn.
Row 13-20: hdc in base of ch 3(beg st), hdc across, 2 hdc in last stitch.
Work a complete row of HDC then a complete row of DC (like when beg diaper cover). Fasten off white
Finishing: With pink, attatch yarn to middle of either section around top. Hdc around, overlaping edges 3 sts and working over double thickness at edges. Join.
Next row: Ch 2, (Fphdc, bphdc) around. Join.
Last row: Sk 2 sts, *5dc in next (complete shell made), sk 2 sts, sl st in next. Rep around. JOIN. Fasten off
Leg edging. Attatch pink to any leg hole. Working from the outside, 26 sc around. Join. Fasten off. Rep for other leg hole.
Shoes
With pink, Ch 8
SOLE
Rnd 1: 2 dc in 3rd ch from hook, dc in next 4 sts. (3 dc, 3 hdc) in last ch. Working on other side of ch, hdc in next 4 chs. (3 hdc) in last ch. Join with sl st.
Rnd 2. Ch 3, dc in same st. (hdc, sc) in next st. Sc in next 6 sts, (sc, hdc) in next st, (hdc, dc) in next st, (2 dc) in next st, (hdc, sc) in next st, sc in next 6 sts, (sc, hdc) in next st. (hdc, dc) in last st. Join to first st with sl st. (28 sts)
SIDES & TOP
Rnd 3. Ch 2, hdc in next st and in each around. Join w/ sl st to ch2. (28 sts)
Rnd 4. CH 2, hdc in next 11 sts, dc2tog, dc3tog, dc2tog, hdc in next 9 sts, join. (24 sts)
Rnd 5. Ch 1,sc in same st, sc in next 10 sts. Hdc2tog, Dc2tog, hdc2tog, sc in next 5 sts, sc 2 tog, join to first sc w/ sl st.
Last 2 rows: Ch 1, sc in same st, sc in next 7 sts, ch 4, sk next 8 sts. sc in last 4 sts. Join, ch 1, sc in same st and in each st and ch around. Join.
Fasten off. Weave in all ends.
source:crotiques.com


Sport weight yarn (Jamie by Lionbrand was used in the models shown)
"J" hook
Size: 20" chest (3-9 months)
Gauge(on yoke): 1 inc and 2 hdc= 1"(measured at the base of the stitches)
*BEG chain does NOT count as first st!
Ch 32
Yoke
1. Sc in second ch from hook and in each ch across. (31 sc). Ch 2, turn
2. Hdc in first 2 sts, 2hdc in next st (inc made). *hdc in next 2 sts. Inc in next. Rep * across to last st. hdc in last st. Ch 2, turn.
3. Hdc in next 2 sts. Inc, *hdc in next 3 sts, inc. Rep * across. hdc in last 2 sts. Ch 2, turn.
4-7. Continue working hdc in each st across with inc in 2nd hdc of inc in row below. Ch 2, turn.
8. Hdc in 1st 5 sts. Inc. Hdc in next 8 sts. Inc. ch 5 (for armhole). Sk 16 sts, hdc in next st, inc in next. hdc in next 8 sts. *Inc. hdc in next 8 sts. Rep * once more. Inc. Ch 5, sk 16 sts. Hdc in next st. Inc. Hdc in next 8 sts. Inc. Hdc in last 4 sts. Ch 3, turn. Do not fasten off.
Body: Beg chain counts as a stitch on these rows
Stitches: V-st[(Dc, ch 1, Dc) in space indicated] Cluster[3dc in same sp]
9. Dc in 1st st. Sk 2 sts. *V-st in next, sk 2 sts. Rep * across to last 2 sts. Dc in last st. Ch 3, turn
10.Dc in 1st st. Cluster in each ch1-sp of v-sts. Dc in beg st. Ch 3 turn
Rep 9 & 10 for body pattern to a total of 16 rows from beginning. Do not fasten off.
Edging
Stitches: Picot[ch 3, sl st into last st made]
Sl st up front in ends of rows, adding 3 evenly spaced button holes (ch 1 or ch 2 instead of sts) between rows 1-8. Sc around neck, adding picots if desired(for lacier look). Sc down other front. Sc across bottom placing picots every 3rd st. Fasten off.
Sleeves
Attatch yarn to underarm. Place between 20-23 sts around. Join. Ch 2, without turning, countinue to work rnds of hd c until legnth of sleeve is desired.(about 10 rows).
11. Hdc-dec in every 3rd st.
12. Sl st around looselyy, placing a picot every 3 sts. Fasten off.
Rep for other sleeve


source:abigailgoss.com
Frill Baby Set (sweater and hat)

Size: Standard Baby 5-10(10-18) lbs. [18(20)" finished chest size]
Guage: 4sts=1"=5rows
Materials:
3.5 oz worsted weight yarn
Size 10 needles (circular or straight)
Ribbon
Box Stitch
Worked on a multiple of 4 sts.
1. *K2,P2. Rep * across
2. *K2,P2. Rep * across
3. *P2, K2. Rep * across
4. *P2, K2. Rep * across
BACK:
1. Use an open (looped) cast on with (36)40 sts on size 10 needles and use Box Stitch.
2. Work even until piece measures 4.5 ins (22 r
ows).
3. Mark this row at both ends for armhole.
4. Work even for about 4.5 ins more (44 rows total).
5. Back neck.Cast off 11 sts at beginning of next 2 rows. (if you wish to graft the shoulder seams together using the Kitcheners Stitch, place shoulder sts on a holder.)Place remaining 18 sts (for back of neck)on holder.
6. Frilled hem.Pick up (36)40 sts from the cast on r
ow.Right side of work facing. K1 *(YO, K1)*, repeat to end. Work 3 rows even.Purl next 2 rows.Cast off loosely.
FRONT:
1-2: Follow steps 1 and 2 as for back.
3. Armhole.Mark this row at both ends for armhole. Continue until armhole measures 2.5 ins (12 rows).
4. Shape neck.Work both sides at the same ti
me.Work 16 sts. Slip the next 8 sts to a holder.With a second ball of yarn, work remaining 16 sts.Dec 1 st at neck edge every row 5 times, until 11 sts remain.
5. Work even until armhole measures 4.5 ins (22 r
ows). Cast off 11 shoulder sts loosely.
6. Frilled hem.Pick up (36)40 sts from the cast on row. Right side of work facing.K1 *(YO, K1)*, repeat to end. Work 3 rows even.Purl next 2 rows.Cast off loosely.
SLEEVES:
1. Cast on 20 sts on size 10 needles. Work in garter stitch or hem pattern of choice for 1 ins.
2. Change to Box Stitch.
3. Inc 1 st at each end of every 3rd row 5 times, then every 4th row twice to 34 sts (23 rows total, excluding hem).
4. Work even until sleeve measures about 5 ins (26 rows), excluding hem. Cast off loosely.
LEFT SHOULDER SEAM:
1. Sew front to back along left shoulder seam. (or graft if desired)
ROUND (CREW) FRONT NECK SINGLE BAND COLLAR:
1. (size 9 needles.)With right side of work facing, pick up and work 18 sts from back neck holder, 9 sts from left front neck edge, 8 sts from front neck holder and 9 sts from right front neck edge.
2. Work 1 ins (5 rows) in K1P1 ribbing. Cast off loosely.
FINISHING:
1.Sew sleeve top to armhole, easing to fit. Sew side and sleeve seams using invisible seam. Sew any remaining seams. Darn/weave/sew in all loose ends.
HAT (both sizes, work same)
Cast on 44 and work in box st for 4"
Top shaping:
(K2tog) across
(K1, K2tog) across
Rep last row, then rep first row. Fasten off and sew side seam.
FRILL
Pick up and knit 44 sts around.
(K1, yo,) around
K even for 4 rows
P two rows. Cast off.
Weave ribbon through eyelets
source:abigailgoss.com

Baby Athos
Shown in size Newborn (3 mos)
SIZES
Directions are for infant’s size Newborn (3 mos). Changes for sizes Small (6 mos) and Medium (9 mos) are in parentheses.
FINISHED MEASUREMENTS
Chest – 19(21-23)”
Length – 9(10-11)”
MATERIALS
3(4-5) Balls BERROCO LOVE IT (50 grs), #3216 Flaxen
Straight knitting needles, sizes 7 (4.50 mm) and 8 (5.00 mm) OR SIZE TO OBTAIN GAUGE
16” Length circular knitting needle, size 6 (4.00 mm)
Crochet hook, size 4.50 mm (G)
Two 1/2” buttons
GAUGE
18 sts = 4”; 24 rows = 4” in St st on larger straight needles
TO SAVE TIME, TAKE TIME TO CHECK GAUGE
BACK
With smaller straight needles, cast on 44(48-52) sts. Knit 4 rows. Change to larger straight needles and work even in St st until piece measures 4 1/2(5-5 1/2)” from beg, end on WS. Mark beg and end of last row for beg of armholes. Work even until armholes measure 4 1/2(5-5 1/2)”, end on WS. Bind off.
FRONT
Work same as back until armholes measure 1/2(1-1 1/2)”, end on WS.
Shape Neck: Next Row (RS): K20(22-24), join another ball of yarn and bind off center 4 sts, k to end. Working both sides at once with separate balls of yarn, bind off 2 sts at each neck edge twice, then dec 1 st at each neck edge EVERY row twice, end on WS – 14(16-18) sts each side. Work 2 rows even. Inc 1 st at each neck edge on each of the next 2 RS rows – 16(18-20) sts each side. Mark each side of neck edge. Work even until armholes measure 4½(5-5½)”, end on WS. Bind off both sides.
SLEEVES
With smaller straight needles, cast on 28(28-30) sts. Knit 4 rows. Change to larger straight needles and work in St st, inc 1 st each side every 1/2” 6(7-10) times – 40(44-50) sts. Work even until sleeve measures 5 1/2(6 1/2-7 1/2)” from beg, end on WS. Bind off.
FINISHING
Medalion: With RS facing, using circular needle, beg at left front neck edge, pick up and k34 sts around neck edge between markers.
Row 1 (WS): Knit.
Row 2 (RS): * K1, yo, rep from * around, end k1.
Row 3: Purl, dropping all yo’s.
Row 4: * K2 tog, rep from * around – 17 sts.
Row 5: * P1, (yo) twice, rep from * around, end p1.
Row 6: Knit, dropping all yo’s.
Row 7: (Sl 1, p2 tog, psso), 5 times, sl 1, p1, psso – 6 sts.
Row 8: (K3 tog) twice, sl 1st st over 2nd st. Fasten off. Sew right shoulder seam.
Neckband: With RS facing, using smaller straight needles, beg at outer edge of left front shoulder, pick up and k17(19-21) sts across left front shoulder, 35 sts around front neck and medallion edge, then 30(32-34) sts across back neck and shoulder edge – 82(86-90) sts. Knit 1 row. Bind off.
Buttonloops: With RS facing, using crochet hook, join yarn with a sl st in first bound-off st of neckband on left shoulder. Work 1 sc in each of the first 4(5-6) sts, ch 5, skip 2 sts, sc in next 5 sts, ch 5, sc in each st to beg of neck. Fasten off. Lap left front shoulder over left back shoulder and sew on buttons under buttonloops. Button shoulder. Sew on sleeves between markers, sewing through double thickness of left shoulder. Sew side and sleeve seams.

source:berroco.com
No comments:
Post a Comment