geoglobe

Showing posts with label How to. Show all posts

Wednesday, August 24, 2011

My Red Hair

I'm always receiving lots of lovely emails from you girlies, and I've noticed that the most popular questions I'm asked are mainly regarding my hair;

"What colour/hair dye do you use on your hair?"
"How do you get your hair so red/purple?"
"How do you ask for your hair cut at the hairdressers?"
"How do you get your hair so big?"


Well, I figured that I would construct a blog post with all the answers for you.
Here is what my hair looks like at the moment;

It's kind of a multi-tone reddish plum colour.

First of all, it has taken me a while to reach this said colour - with many different hair dyes later, this is finally the colour I've been lusting after for so long.

I started off with really dark brown hair and used Loreal Feria Plum Power for a good few months, just topping up my roots when I needed to. This gave my hair a nice reddish brown shine to it. I was really eager to get red hair, but I didn't want to damage my hair for this result. I've damaged my hair in the past and it isn't a good look. So, bleaching and stripping kits have always been a big no- no for me.

After a while of using Loreal Feria Plum Power, my hair got slightly brighter after every use. I then moved on to a Red by Swarzkopft. I'm not entirely sure of the colour but it was something like 'Real red'. I used this and didn't really like it that much as it left an orange tinge to my roots.

Wanting to get rid of this, I opted for Swarzkopft Cyber Plum. On the box is looked a really bright shiny plum. I can assure you it was the biggest hair mistake ever. The colour sent my hair black.

In desperation to lighten my hair back up I purchased one of the paint pots by Directions in Poppy Red. And since then, my hair has been this colour.


I just thought I would give you an insight to the products and colours I'm currently using on my hair;


I usually dye my hair with this Loreal hair dye whenever I get root regrowth, which is usually up to 6-8 weeks.

So that I'm not damaging my hair dying it all the time as red is very high maintenance, I usually whack one of these paint pots on every three weeks just to brighten the red which is already on it. I use 'Poppy Red', you can purchase these from little Goth shops usually and they're roughly £3.00 depending on where you get them. With my hair being long I tend to use two pots.

These paint pots are so easy to use. You literally shampoo your hair, rinse, slop this on for 15mins, rinse and then apply your conditioner and rinse as normal. Make sure you wear gloves though as it will stain!

Here is the Shampoo and Conditioner I'm also using to help maintain my red hair.

And so there you have it! My Red Hair Journey.

I hope this post has been of help. If you have anymore questions or queries, then feel free to comment below and I'll be glad to help!

Monday, April 11, 2011

How to: Tint your eyebrows at home

Despite my natural hair colour being quite a dark brown, my body hair has always been very fair. This is a blessing in one way, but for my eyebrows, it's always been a curse. My hair colour at the moment is a deep plummish colour - which doesn't go very well with my blondish eyebrows. They can actually look non-existent! I'm forever having to darken them with eyebrow tints/pencils, you name it.

In my younger years, I stupidly over plucked them into oblivion - resulting with some very poor excuses for eyebrows. My poor little brows never fully recovered and now they really struggle to grow back fully.

With this all in mind, I was wondering how all you girls take care of your eyebrows?

Salon tinting can prove quite expensive when you're having to make regular trips. So, in this post I'm going to explain how I tiny my own eyebrows at home. If you have never tried this, it could be a great idea for you. I've used the Dylash kits before as I just don't feel they work as well as the products I'm currently using.


OK, so what you'll need is:

* Eyelash dye activating solution
* Eyelash Dye (I use 'brown')
* A very thin brush
* A small glass


Step 1:
Pour two drops of Eyelash Activating Solution into your small glass.


Step 2:
Then, add roughly a 2cm length of Eyelash Dye to your solution. This will make the perfect consistency for applying.


Step 3:
Using your brush, mix together the Dye and the Solution.


Step 4:
Using your brush, dip the end into the dye mixture and carefully apply to your eyebrow area. Making sure than you coat all of the hairs. Be very careful with a steady hand and try not to get any on your skin surrounding your eyebrows as this will stain. If you make any mistakes, wipe away with a cotton bud before the dye dries. I usually apply a thick coat to my eyebrows to make sure that I've covered each and every strand of hair.

Step 5:
Leave on for roughly 10minutes until the dye has dried.


Step 6:
Using a cotton pad soaked in eye make-up remover (or a baby wipe - whatever you choose), gently wipe away the remaining dye until your eyebrows are completely clean.

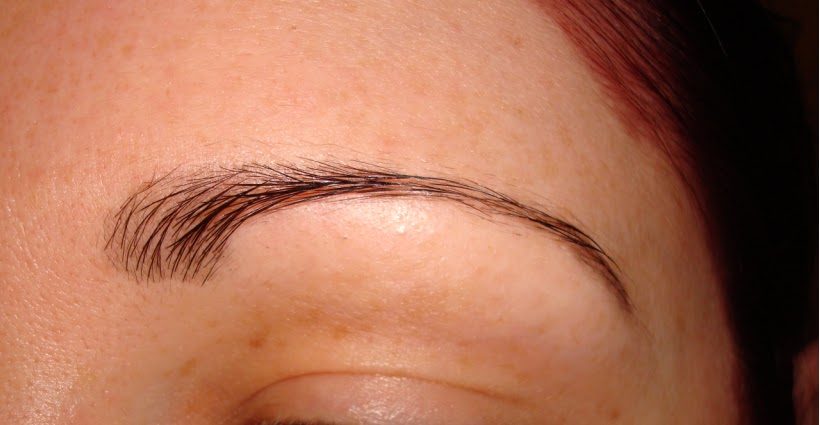
And voila! Home tinted eyebrows!


I hope this post has been helpful for any of you ladies who are wanting to give home tinting a try!